はじめに
本日は Docker for Mac についてメモ程度に学んだことを書き残しておきたいと思います。Docker for MacとはMacアプリとしてインストールできるDockerです。Docker ToolboxとVirtual Boxをインストールする必要がありましたが、Docker for Macの登場により、いろいろとやってくれそうな感があります。
Docker for Macのインストール
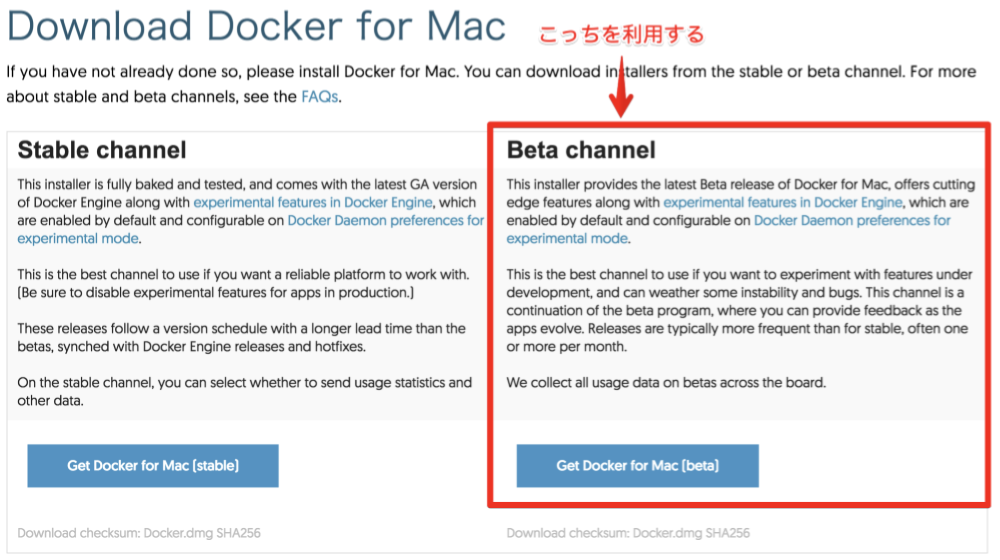
簡単かと思いきや、なぜか詰まることもあるので書きます。Docker公式ページ から可能です。Download Docker for Mac という文字が見つかります。Stable channelとBeta channelの2つがあるのですが、筆者は最終的にBeta channelをインストールしました。Stable channelではdocker run hello-worldが実行エラーになったためです…
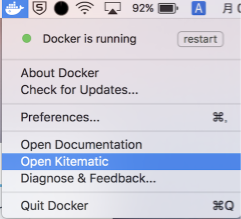
インストールが完了すると、macのツールバーにDockerのマークが出現します。
Dockerが正しくインストールされたので下記コマンドでバージョンを確認してみましょう。
1
2
3
4
5
6
7
8
$ docker -- version
Docker version 1.13 . 1 , build 092 cba3
$ docker - compose -- version
docker - compose version 1.11 . 1 , build 7 c5d5e4
$ docker - machine -- version
docker - machine version 0.9 . 0 , build 15 fd4c7
続いて、Dockerが期待通りに動くことを確認するために下記コマンドを叩いてみましょう。
1
2
3
4
5
6
7
8
9
10
11
12
13
14
15
16
17
$ docker version
Client :
Version : 1.13 . 1
API version : 1.26
Go version : go1 . 7.5
Git commit : 092 cba3
Built : Wed Feb 8 08 : 47 : 51 2017
OS / Arch : darwin / amd64
Server :
Version : 1.13 . 1
API version : 1.26 ( minimum version 1.12 )
Go version : go1 . 7.5
Git commit : 092 cba3
Built : Wed Feb 8 08 : 47 : 51 2017
OS / Arch : linux / amd64
Experimental : true
ClientとServerの両方のバージョンが確認できるようです。
続いて、ローカルに存在するDockerコンテナの確認です。
1
2
$ docker ps
CONTAINER ID        IMAGE               COMMAND             CREATED             STATUS              PORTS               NAMES
何もないと当然ですが、上記のように何も表示されません。hello-worldコマンドです。
1
2
3
4
5
6
7
8
9
10
11
12
13
14
15
16
17
18
19
20
21
22
23
24
25
26
$ docker run hello - world
Unable to find image 'hello-world:latest' locally
latest : Pulling from library / hello - world
78445 dd45222 : Pull complete
Digest : sha256 : c5515758d4c5e1e838e9cd307f6c6a0d620b5e07e6f927b07d05f6d12a1ac8d7
Status : Downloaded newer image for hello - world : latest
Hello from Docker !
This message shows that your installation appears to be working correctly .
To generate this message , Docker took the following steps :
1 . The Docker client contacted the Docker daemon .
2 . The Docker daemon pulled the "hello-world" image from the Docker Hub .
3 . The Docker daemon created a new container from that image which runs the
executable that produces the output you are currently reading .
4 . The Docker daemon streamed that output to the Docker client , which sent it
to your terminal .
To try something more ambitious , you can run an Ubuntu container with :
$ docker run - it ubuntu bash
Share images , automate workflows , and more with a free Docker ID :
https : //cloud.docker.com/
For more examples and ideas , visit :
https : //docs.docker.com/engine/userguide/
ローカルに存在しないとダウンロードを始めます。Stable channelでは、ここで全くダウンロードができませんでした。Docker for Mac のインストール完了です。
Docker for Macを使ってUbuntuをインストールしてみよう
先程インストールしたhello-worldの結果の中にTo try something more ambitious, you can run an Ubuntu container with:とありました。
1
2
3
4
5
6
7
8
9
10
11
$ docker run - it ubuntu bash
Unable to find image 'ubuntu:latest' locally
latest : Pulling from library / ubuntu
8 aec416115fd : Pull complete
695 f074e24e3 : Pull complete
946 d6c48c2a7 : Pull complete
bc7277e579f0 : Pull complete
2508 cbcde94b : Pull complete
Digest : sha256 : 71 cd81252a3563a03ad8daee81047b62ab5d892ebbfbf71cf53415f29c130950
Status : Downloaded newer image for ubuntu : latest
root @ 3 e95790a60cb : /#
これでUbuntuがインストールできたようです。Ubuntuの中に入れてますね!
本当にUbuntuインストールできたか確かめるためにもコマンドを叩いてみましょう。
1
2
3
4
5
6
7
8
9
10
11
root @ 3 e95790a60cb : /# cat /etc/lsb-release
DISTRIB_ID = Ubuntu
DISTRIB_RELEASE = 16.04
DISTRIB_CODENAME = xenial
DISTRIB_DESCRIPTION = "Ubuntu 16.04.1 LTS"
root @ 3 e95790a60cb : /# arch
x86_64
root @ 3 e95790a60cb : /# uname -a
Linux 3 e95790a60cb 4.9 . 8 - moby # 1 SMP Wed Feb 8 09 : 59 : 13 UTC 2017 x86_64 x86_64 x86_64 GNU / Linux
バッチリですね!!uname -aとか数年ぶりに叩いた気がして懐かしい…笑)
これで後はもう様々な便利なものをインストールして楽しめそうですね。
Kitematicの紹介
メニューバーのDockerマークをクリックすると、Docker for Macのメニュー項目が表示されます。Kitematicという聞きなれないものがあると思います。
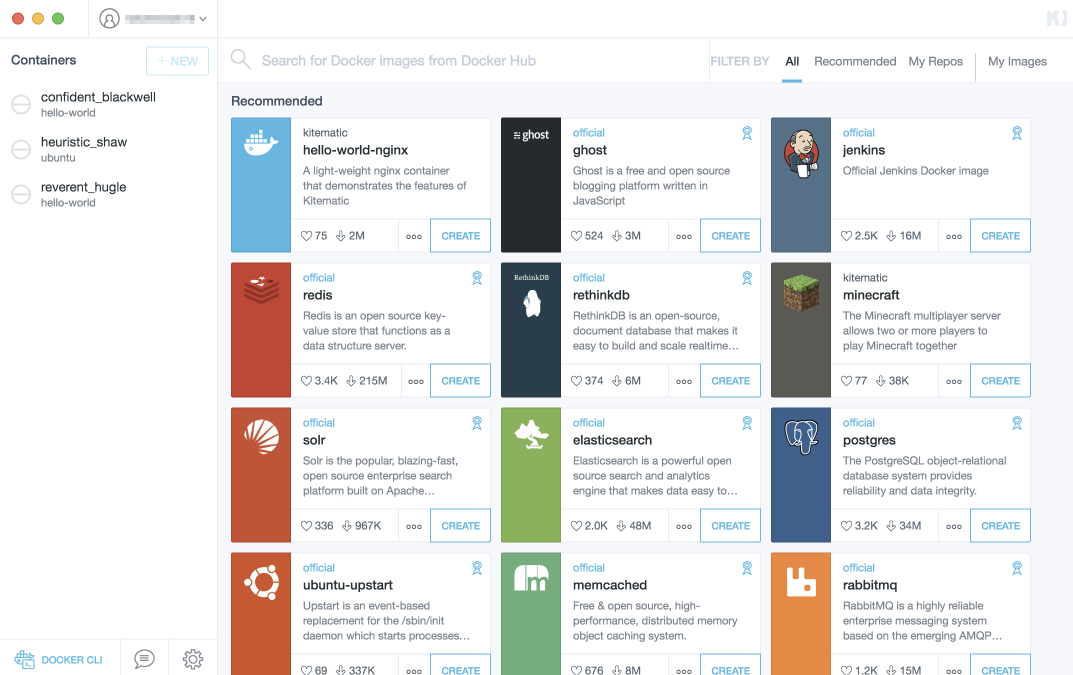
起動してログインすると(初めはアカウントがないと思うので作成しましょう。)、下記のような画面が表示されます。
最早、見るだけで心躍りますよね!?
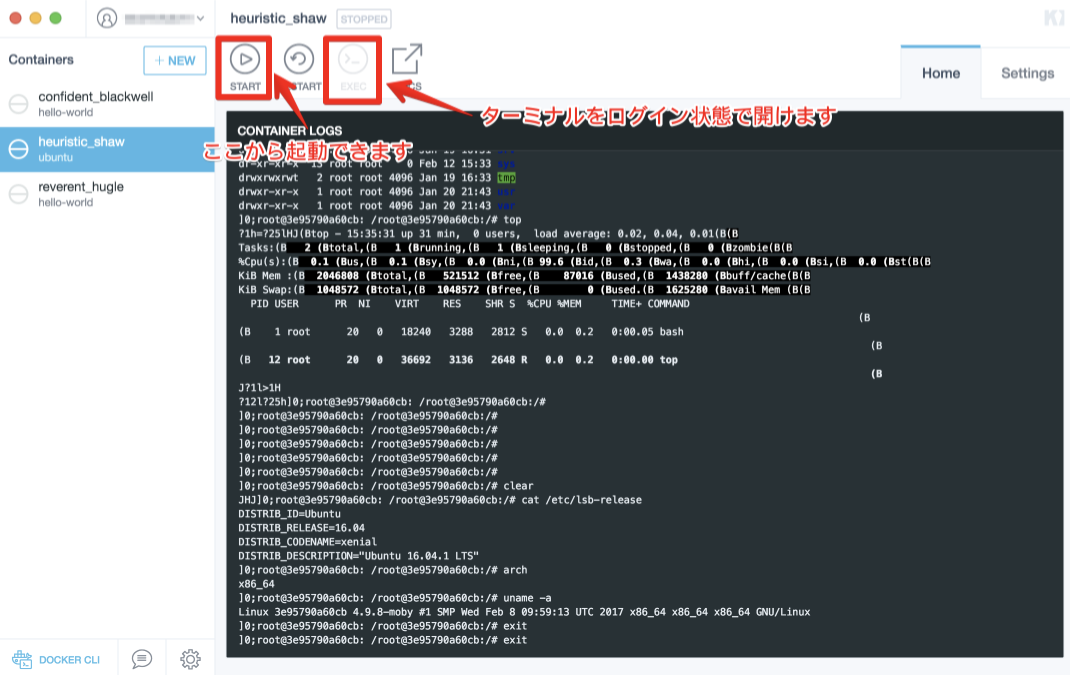
因みに、下記のようにコンテナの起動などが可能です。
まとめ
さて、今回は珍しく基盤よりなDockerで遊んでみました。


