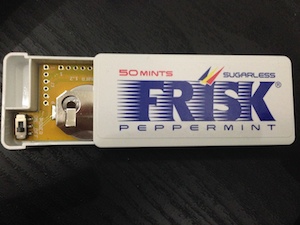
Takahiro Octopress Blog

-1から始める情弱プログラミング

REBL600FRを検知するiOSアプリを開発してみた!

REBL600FRを検知

引き続き、REBL600FRを用いて遊んでみたいと思います。
前回のREBL600FRをiBeaconとして検知してみた!では既存のアプリを拝借してREBL600FRを検知していました。
今回はそこを自作してみたいと思います。

そのためにCoreBluetooth.frameworkを使います。
まずは、REBL600FRの発信するBLEを検知してみましょう。

1
2
3
4
5
6
7
8
9
10
11
12
13
14
15
16
17
18
19
20
21
22
23
24
25
26
27
28
29
30
31
32
33
34
35
36
37
38
// ViewController.mファイル

#import "ViewController.h"
#import <CoreBluetooth/CoreBluetooth.h>

@interface ViewController ()<CBCentralManagerDelegate, CBPeripheralDelegate>

@property(strong, nonatomic) CBCentralManager *cm;
@property(strong, nonatomic) CBPeripheral *connectedPeripheral;

@end

@implementation ViewController

- (void)viewDidLoad
{
  [super viewDidLoad];

  // 1: CBCentralManagerの初期化
  self.cm = [CBCentralManager alloc] initWithDelegate:self queue:nil options:nil];]
}

- (void)didReceiveMemoryWarning
{
  [super didReceiveMemoryWarning];
}

#pragma mark - CBCentralManagerDelegate
- (void)centralManagerDidUpdateState:(CBCentralManager *)central
{
  if(central.state == CBCentralManagerStatePoweredOn) {
      // Centralとして機能可能な場合
      // 2: Peripheralのスキャンを開始
      [self.cm scanForPeripheralsWithServices:nil options:nil];
  }
}

@end

上記ソースの説明をします。
1でCBCentralManagerを初期化すると、centralManagerDidUpdateStateメソッドが呼び出されます。
そこで、Centralとして機能する(BluetoothがONで正常である)場合に限り、scanForPeripheralsWithServicesメソッドを実行することでPeripheralのスキャンを開始します。

今回は、scanForPeripheralsWithServicesserviceUUIDsoptionsをnilにしています。
もし、あらかじめスキャンしたいBLEのUUIDが決まっているのであれば、

1
NSArray *services = [NSArray arrayWithObjects:[CBUUID UUIDWithString:@"C6D0F826-CCBA-4738-97CE-81491F748039"], nil];

といったように指定してあげましょう。
※ nilの指定は非推奨とされています。

また、optionsにはCBCentralManagerScanOptionAllowDuplicatesKeyCBCentralManagerScanOptionSolicitedServiceUUIDsKeyを指定可能となっています。
CBCentralManagerScanOptionAllowDuplicatesKeyを明示的指定しない場合はデフォルトNOと判断されます。
YESにした場合、Peripheralからアドバタイズパケットを受信する度にペリフェラル発見通知が実行されます。

CBCentralManagerScanOptionSolicitedServiceUUIDsKeyにはスキャンしたいUUIDの配列を指定できます。
servicesで既に指定しているので、実際のところ何が違うのでしょうか…。

続いての実装です。

1
2
3
4
5
6
7
8
9
10
- (void)centralManagerDidUpdateState:(CBCentralManager *)central
{
  <省略>
}

- (void)centralManager:(CBCentralManager *)central didDiscoverPeripheral:(CBPeripheral *)peripheral advertisementData:(NSDictionary *)advertisementData RSSI:(NSNumber *)RSSI
{
  NSLog(@"%@", RSSI);
  NSLog(@"%@", advertisementData);
}

scanForPeripheralsWithServices実行後にPeripheralを発見した場合、didDiscoverPeripheralメソッドが呼び出されます。
このメソッドでは、advertisementDataRSSIの値を取得できます。

では、実際に取得できる値を見てみましょう。
scanForPeripheralsWithServicesが実行された後に、REBL600FRのスイッチをONにします。

REBL600FRのスイッチをONにしましょう。

すると、

1
2
3
4
5
6
7
RSSI = -94

advertisementData = {
  kCBAdvDataChannel = 37,
  kCBAdvDataIsConnectable = 1,
  kCBAdvDataLocalName = "Laird iBeacon"
}

と値を取得できました。
kCBAdvDataChannelはBLEデバイスの発見と接続に利用するアドバタイズメントチャネルのことで、kCBAdvDataIsConnectableは接続可能なPeripheralかどうか判別する値(1であれば接続可)で、kCBAdvDataLocalNameはPeripheralの名前のことです。

AppleのCBCentralManagerDelegate Protocol Referenceを見ると、advertisementDataには他にも取得可能な値が入っていることがあるようです。

REBL600FRに接続

次に、先ほど発見することができたREBL600FRに接続してみたいと思います。
didDiscoverPeripheralが実行されたときに検知したperipheralに接続するようにしてみます。

1
2
3
4
5
6
7
8
9
10
11
- (void)centralManager:(CBCentralManager *)central didDiscoverPeripheral:(CBPeripheral *)peripheral advertisementData:(NSDictionary *)advertisementData RSSI:(NSNumber *)RSSI
{
  NSLog(@"%@", RSSI);
  NSLog(@"%@", advertisementData);

  self.connectedPeripheral = peripheral;
  self.connectedPeripheral.delegate = self;

  // Peripheralへの接続処理
  [self.cm connectPeripheral:self.connectedPeripheral options:nil];
}

connectPeripheralメソッドで接続したいPeripheralに接続することができます。
このときoptionsにはCBConnectPeripheralOptionNotifyOnConnectionKey, CBConnectPeripheralOptionNotifyOnDisconnectionKey, CBConnectPeripheralOptionNotifyOnNotificationKeyの3種類のいずれかを指定可能です。
それぞれ、Peripheralと接続, Peripherlと切断, PeripheralからNotificationを受信した場合にアラートを表示したい場合に指定します。

接続が確立された場合にcentralManager:didConnectPeripheral:メソッドが呼び出されます。
この中で、Peripheralが提供するサービスを検索する処理を書いてみましょう。

1
2
3
4
5
6
7
8
9
// Peripheralと接続できた場合に呼び出される処理
- (void)centralManager:(CBCentralManager *)central didConnectPeripheral:(CBPeripheral *)peripheral
{
  // スキャンの停止
  [self.cm stopScan];

  // Peripheralのサービスを検索
  [self.connectedPeripheral discoverServices:nil];
}

電池の消耗を防ぐために、接続が確立された後はPeripheralのスキャンを停止します。
discoverServicesメソッドでPeripheralのサービスを検索します。
引数には検索したいサービスのUUIDの配列を指定可能です。
nilにした場合は全てのサービスを検索します。こちらもnilの指定は非推奨とされています。

サービスが見つかると、didDiscoverServices:メソッドが呼び出されます。
そこでさらに、サービスが持っているキャラクタリスティックを検索します。

1
2
3
4
5
6
7
8
9
10
11
12
#pragma mark - CBPeripheralDelegate
// Servicesが見つかったときに呼び出される処理
- (void)peripheral:(CBPeripheral *)peripheral didDiscoverServices:(NSError *)error
{
  NSArray *services = peripheral.services;

  for(CBService *service in services) {
      NSLog(@"Service UUID: %@", service.UUID);
      // Characteristicsの検索
      [peripheral discoverCharacteristics:nil forService:service];
  }
}

キャラクタリスティックの検索はdiscoverCharacteristics:メソッドを使います。
例によって、引数のcharacteristicUUIDsはnilを指定することで、全てのキャラクタリスティックを検索しています。
もちろんnilは非推奨とされています。

今回は取得できた全てのサービスに対して、全てのキャラクタリスティックを検索するため、上記のようにfor文を使っています。

キャラクタリスティックが見つかると、didDiscoverCharacteristicsForService:メソッドが呼び出されます。

1
2
3
4
5
6
7
8
9
10
- (void)peripheral:(CBPeripheral *)peripheral didDiscoverCharacteristicsForService:(CBService *)service error:(NSError *)error
{
  
  for(CBCharacteristic *characteristic in service.characteristics) {
      // 値が変わったときに通知を受けたい場合に実行
      [peripheral setNotifyValue:YES forCharacteristic:characteristic];
      // キャラクタリステックのvalueを知りたい場合に実行
      [peripheral readValueForCharacteristic:characteristic];
  }
}

setNotifyValueはキャラクタリステックの値が変わったときにdidUpdateNotificationStateForCharacteristic:error:を呼び出すためにYESで設定しています。
readValueForCharacteristic:メソッドは検索して見つかったキャラクタリステックの値を読むために実行しています。

因みに、CBCharacteristicクラスはプロパティにpropertiesを持っています。
これは、そのデータが Read Only なのか Read and Write なのかを判別するために利用します。
REBL600FRの場合、characteristicsをNSLogでログ出力してみると、

1
2
3
4
5
// Read Onlyの例
characteristic: <CBCharacteristic: 0x175744d0 UUID = Manufacturer Name String, Value = (null), Properties = 0x2, Notifying = NO, Broadcasting = NO>

// Read and Writeの例
characteristic: <CBCharacteristic: 0x17572690 UUID = 569A2010-B87F-490C-92CB-11BA5EA5167C, Value = (null), Properties = 0xA, Notifying = NO, Broadcasting = NO>

となりました。
CBCharacteristic Class Referenceを見ると、0x2CBCharacteristicPropertyReadとされていますが、0xAは該当するものが記載されていませんでした。

キャラクタリステックの値の取得が完了すると、didUpdateValueForCharacteristic:error:メソッドが呼ばれます。

1
2
3
4
5
- (void)peripheral:(CBPeripheral *)peripheral didUpdateValueForCharacteristic:(CBCharacteristic *)characteristic error:(NSError *)error
{
  NSString *value = [[NSString alloc] initWithData:characteristic.value encoding:NSUTF8StringEncoding];
  NSLog(@"value: %@", value);
}

これで各パラメータの値が確認できました。
気をつけたいのは、major, minor, Tx PowerなどはUTF8でエンコードをかけると文字化けしたログを吐くので、どんな値か見たい場合はエンコードせずにNSDataの値のまま見てみましょう。

う〜ん。今回は時間切れですね…。
次回はREBL600FRのパラメータをiPhoneから書き換えることにチャレンジしたいと思います。

といったところで本日はここまで。
ソースはパラメータの書き換えが完了したタイミングでGitHubにアップしたいと思います。

参考:
CoreBluetoothで出来る事
Bluetooth Low Energy(BLE)/ iBeaconとは
Reinforce-Lab’s Blog

Comments