OAuth2Clientを利用したOAuth認証をやってみる
前回はgtm-oauth2ライブラリを利用したOAuth認証について説明しました。
このライブラリは非常に使いやすく、WebViewの実装もやってくれるので楽です。
ただ、1つだけ気になるのが、『このアプリが次のリクエストを許可しています』画面で承認するボタンを押した後に下記のような画面が出てしまうことです。
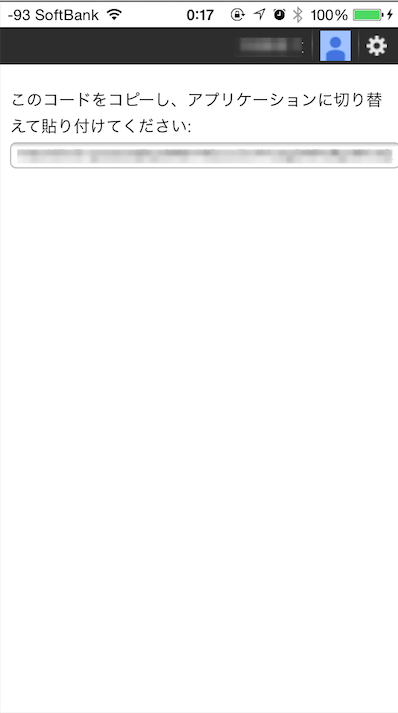
これは格好悪いですね…。できれば、この画面を出したくない…。
そもそもこの画面が表示される理由は、redirectURIにurn:ietf:wg:oauth:2.0:oobを設定した場合だそうです。
詳しくは山本大@クロノスの日記 – GoogleAPI利用のためにOAuth2.0を使うを確認してください。
gtm-oauth2ではredirectURIを開発者側で設定することなく、ライブラリが自動でやってくれるため、どうにもできないんですね…。
ま、ドメインのあるアドレスも持ってないですけど…。
そこで、OAuth2Clientを使ってみることにしました。
OAuth2Clientを使おう!!
CocoaPodsを使った導入方法から説明します。(CocoaPodsインストールしている前提です。)
1: .xcodeprojファイルと同じ階層にPodfileを作成します。
2: Podfileの中身は『pod ‘NXOAuth2Client’, ‘~>1.2.2’』の1行のみです。
3: pod install
4: 作成された.xcworkspaceファイルを開く
たったこれだけのことでOAuth2Clientを使う準備が整いました。
では、続けて、画面を追加していきましょう。
今回は下記2つのUIViewControllerを追加しました。
・OAuth認証用の画面
・OAuth認証後に表示するメイン画面
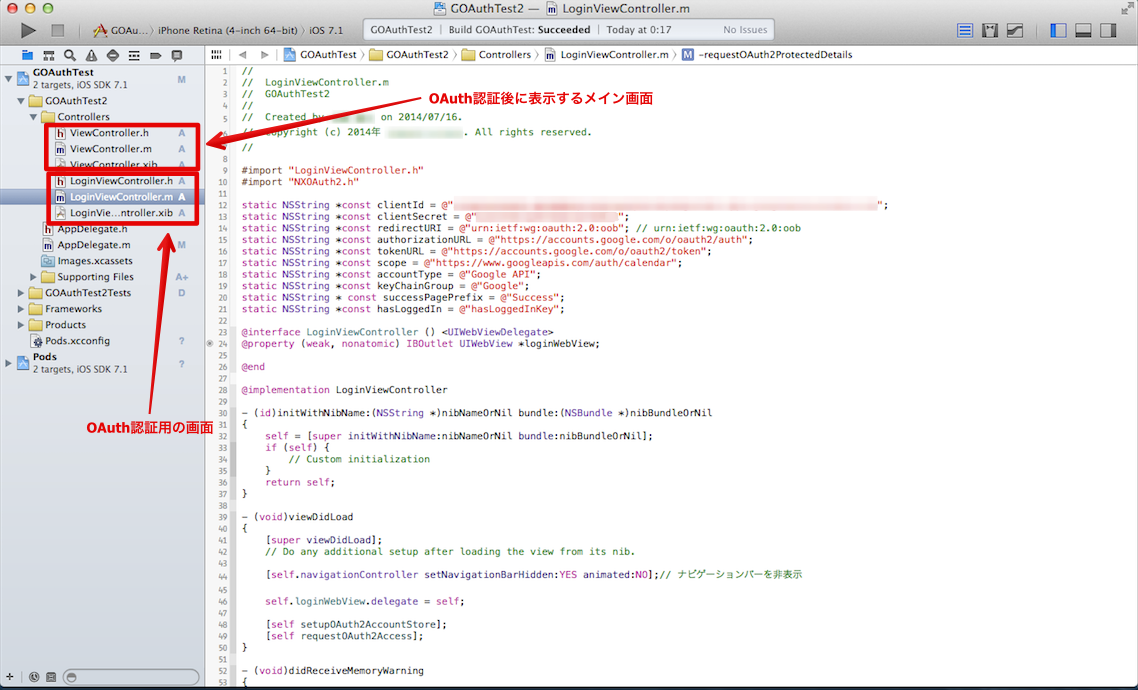
OAuth認証後に表示するメイン画面はアプリの用途によって異なると思うので、割愛して、OAuth認証用の画面について説明します。
LoginViewController.mファイル
1
2
3
4
5
6
7
8
9
10
11
12
13
14
15
16
17
18
19
20
21
22
23
24
25
26
27
28
29
30
31
32
33
34
35
36
37
38
39
40
41
42
43
44
45
46
47
48
49
50
51
52
53
54
55
56
57
58
59
60
61
62
63
64
65
66
67
68
69
70
71
72
73
74
75
76
77
78
79
80
81
82
83
84
85
86
87
88
89
90
91
92
93
94
95
96
97
98
99
100
101
102
103
104
105
106
107
108
109
110
111
112
113
114
115
116
117
118
119
120
121
122
123
124
125
126
127
128
129
130
131
132
133
134
135
136
137
138
139
140
141
142
143
144
145
146
147
148
149
150
| #import "LoginViewController.h"
#import "NXOAuth2.h"
// OAuthのConfigureに必要な値の設定
static NSString *const clientId = @"Google Consoleで登録したクライアントID";
static NSString *const clientSecret = @"Google Consoleで登録したクライアントシークレット";
static NSString *const redirectURI = @"urn:ietf:wg:oauth:2.0:oob";
static NSString *const authorizationURL = @"https://accounts.google.com/o/oauth2/auth";
static NSString *const tokenURL = @"https://accounts.google.com/o/oauth2/token";
static NSString *const scope = @"https://www.googleapis.com/auth/userinfo.profile";
static NSString *const accountType = @"Google API";
static NSString *const keyChainGroup = @"Google";
static NSString *const successPagePrefix = @"Success";
static NSString *const hasLoggedIn = @"hasLoggedIn";
@interface LoginViewController () <UIWebViewDelegate>
@property (weak, nonatomic) IBOutlet UIWebView *loginWebView;
@end
<省略>
- (void)viewDidLoad
{
[super viewDidLoad];
// WebViewのDelegate Protocolを利用するために設定
self.loginWebView.delegate = self;
// OAuth認証の処理
NSUserDefaults *defaults = [NSUserDefaults standardUserDefaults];
BOOL flag = [defaults boolForKey:hasLoggedIn];
if(!flag) {
// 一度もOAuth認証を通っていない場合
[self setupOAuth2AccountStore];
[self requestOAuth2Access];
} else {
// 一度はOAuth認証を通した場合
[self requestOAuth2ProtectedDetails];
}
}
- (void)setupOAuth2AccountStore
{
// OAuth認証のための準備。各パラメータ値を設定
[[NXOAuth2AccountStore sharedStore] setClientID:clientId
secret:clientSecret
scope:[NSSet setWithObject:scope]
authorizationURL:[NSURL URLWithString:authorizationURL]
tokenURL:[NSURL URLWithString:tokenURL]
redirectURL:[NSURL URLWithString:redirectURI]
keyChainGroup:keyChainGroup
forAccountType:accountType];
// OAuth認証が成功したときに受け取るNotification
[[NSNotificationCenter defaultCenter] addObserverForName:NXOAuth2AccountStoreAccountsDidChangeNotification
object:[NXOAuth2AccountStore sharedStore]
queue:nil
usingBlock:^(NSNotification *aNotification){
if (aNotification.userInfo) {
NSLog(@"Success!! We have an access token.");
NSUserDefaults *defaults = [NSUserDefaults standardUserDefaults];
[defaults setBool:YES forKey:hasLoggedIn];
[self requestOAuth2ProtectedDetails];
} else {
NSLog(@"Success!! We lost an access token.");
}
}];
// OAuth認証に失敗したときに受け取るNotification
[[NSNotificationCenter defaultCenter] addObserverForName:NXOAuth2AccountStoreDidFailToRequestAccessNotification
object:[NXOAuth2AccountStore sharedStore]
queue:nil
usingBlock:^(NSNotification *aNotification){
NSError *error = [aNotification.userInfo objectForKey:NXOAuth2AccountStoreErrorKey];
NSLog(@"error: %@", error.localizedDescription);
}];
}
// Googleログイン画面をUIWebViewに表示する処理
- (void)requestOAuth2Access
{
[[NXOAuth2AccountStore sharedStore] requestAccessToAccountWithType:accountType
withPreparedAuthorizationURLHandler:^(NSURL *preparedURL){
[self.loginWebView loadRequest:[NSURLRequest requestWithURL:preparedURL]];
}];
}
// アクセストークンやリフレッシュトークンを取得するための処理
- (void)handleOAuth2AccessResult:(NSString *)accessResult
{
BOOL success = [accessResult rangeOfString:successPagePrefix options:NSCaseInsensitiveSearch].location != NSNotFound;
if(success) {
// OAuth認証の画面で承認するを選択した場合
NSString * arguments = accessResult;
if ([arguments hasPrefix:successPagePrefix]) {
arguments = [arguments substringFromIndex:successPagePrefix.length + 1];
}
NSString *redirectURL = [NSString stringWithFormat:@"%@?%@", redirectURI, arguments];
[NXOAuth2AccountStore sharedStore] handleRedirectURL:[NSURL URLWithString:redirectURL]];]
} else {
// OAuth認証の画面で承認しなかった場合
// 再度、Googleログインページに遷移させる
[self requestOAuth2Access];
}
}
// OAuth認証後にユーザ情報取得のAPIを投げる処理
- (void)requestOAuth2ProtectedDetails
{
NXOAuth2AccountStore *store = [NXOAuth2AccountStore sharedStore];
NSArray *accounts = [store accountsWithAccountType:accountType];
[NXOAuth2Request performMethod:@"GET"
onResource:[NSURL URLWithString:@"https://www.googleapis.com/oauth2/v1/userinfo"]
usingParameters:nil
withAccount:accounts[0]
sendProgressHandler:^(unsigned long long bytesSend, unsigned long long bytesTotal) {
}
responseHandler:^(NSURLResponse *response, NSData *responseData, NSError *error){
if (responseData) {
NSError *error;
NSDictionary *userInfo = [NSJSONSerialization JSONObjectWithData:responseData options:NSJSONReadingMutableContainers error:&error];
NSLog(@"%@", userInfo);
}
if(error) {
NSLog(@"%@", error.localizedDescription);
}
}];
}
#pragma mark - UIWebViewDelegate
// ページが読み終わった後に処理
- (void)webViewDidFinishLoad:(UIWebView *)webView
{
if ([webView.request.URL.absoluteString rangeOfString:authorizationURL options:NSCaseInsensitiveSearch].location != NSNotFound) {
self.loginWebView.hidden = NO;
} else {
self.loginWebView.hidden = YES;
NSString *pageTitle = [webView stringByEvaluatingJavaScriptFromString:@"document.title"];
NSLog(@"pageTitle: %@", pageTitle);
[self handleOAuth2AccessResult:pageTitle];
}
}
|
重要なことはwebViewDidFinishLoadの中で見せたくない画面を隠せるように実装していることです。
これがgtm-oauth2ライブラリではできなかったことですね。
また、gtm-oauth2ライブラリと同じく、OAuth2Clientライブラリも「アクセストークンが期限切れになった場合にリフレッシュトークンを投げることで新しいアクセストークンを取得する処理」を実装しています。そのため、自身で実装するよりも工数を削減することができます。
Googleだけでなく、twitter, facebookなどのOAuth認証でも利用できますので、ぜひお試しあれ!!
参考
・IDMWORKS : BLOG